Translate

Sunday, October 19, 2014

Furniture Preview!!!

Villa Caribbean Palm

I have spent many hours searching and shopping for the right items for this caribbean villa.
Below is just a small preview of what we've purchased.
Some items we couldn't get printed, but I think that this small preview will show
what a island relaxed environment we are trying to create.
Living and Dining shown above.  The kitchen will welcome you to warm custom reclaimed barnwood cabinetry with exquisite granite, copper apron sink and stainless steel commercial appliances.  With every room the caribbean breeze and view can be appreciated.


Above is just one of three master suites.  Each with upscale plush furnishings where guests will enjoy a vintage eclectic island feel.  Warm linens, plush bath towels with the view of the tropics from every window.


When it comes to building a custom home sometimes people lose sight of the interior design and finishings.  I have walked through every room of this house before it was even built and have envisioned the finishing touches.  Above is another master suite with just a warm inviting feel.
More to come and we would love to hear your feedback.

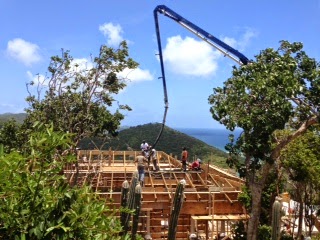
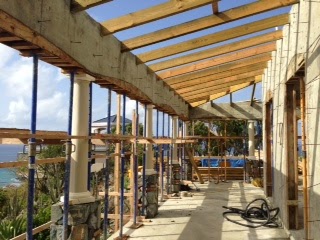
This week…..finish the plaster inside, starting to lay the travertine tile, we will begin cutting the old chicago brick for the lanai and pool deck.  New update to follow soon.


Thursday, October 16, 2014

Roof is complete Simply Beautiful! Plaster is moving along quickly as well!!!!


The roof is complete!  We could not be happier.  The two guys that installed it were flown in from Florida to install our roof.   They are the premier clay tile roof installers on St John.  They hung the 6" copper gutters, installed the downspouts and installed this entire clay roof in less than 10 working days!

Close up view of the clay tile and 6" copper gutters


Another Close up view.  Look closely at the caps that cover the plumbimg vent pipes

So backing up a few steps....This picture is the container that was  used to ship the clay tile from from France.  On St John it is known as the "Peter Bay" tile.  It is beautiful..We ordered the clay tile back in April just after we started construction to make sure it was able to be on site in time.  The container first had to make a pitstop in Jacksonville where it cleared customs.  Then Lester, our roofing contractor, met the container and loaded it with the custom 6" copper gutters he fabricated 1150 miles away.  The container was then shipped to St Thomas and then brought overon a barge.


We are very fortunate, as you can see by the picture to the left, that we were able to build a ramp onto the roof so we were able to access the roof very easily.  This was Denises idea and it was brilliant!
This is a picture of the gutters stored in the main floor bedroom.  We kept them safe until they were ready to be hung.  Pretty penny sitting there.  ha ha get it?
Ok so now onto the plaster.....We decided to start inside on the lower level so we can "work our way up and out of the villa".  Once we are done plastering  the inside, we can begin to lay our beautiful travertine and simultaneously begin to plaster the out side.   This picture is one of the lower bedrooms and already has the "scratch coat" applied which is the first coat of plaster.  Once that dries over a few days, two more coats of plaster are applied.  We decided to use a colored plaster and it has a Tuscan finish which tends to be more vintage.  
T

Here is a quick video clip showing the three plaster contractors applying the first coat.  This first coat is applied and then allowed  to "set up" for an hour or two and then the final coat is applied.  This enhances the Tuscan look.  As of today, the entire lower level consisting of two master suites, 2 ensuite bathrooms with out door showers over looking Fish Bay and the Caribbean Sea, and the two story stair well are complete and we have moved upstairs to the main level.
This is a picture of the main floor master suite.  They finished this room today.  I took this picture just after they finished the first coat of the colored plaster but before the closet was plastered so you could appreciate the color.  It is gorgeous!  This Master Suite has 16 ft high vaulted cielings with the same ensuite bath and outdoor shower the other two Master suites have. Once the travertine is installed and the doors hung back on the frames, we will finally be able to see all of our hard work and planning come together!
 
One last view of the villa and the roof.  If you are sitting on the pool deck admiring the scenery (see the picture below) and you look to your left this is what you see. This beautiful covered veranda which is a short stroll  and only two steps to the fridge for another coctail!

Not much to say here except you could be sitting here this winter enjoying the breezes and the view.  Tomorrow we start plastering the remainder of the main level which will take a week or so to finish.  We will simultaneously be applying the scratch coat on the exterior.  We should be laying the travertine druing the month of November and also laying all of the chicago brick pavers on the veranda and pool deck.  Early  to mid December we will plaster the pool, landscape and get our cabinets installed.  They are due on island by the 8th of December.  We are flying to Florida to pick our granite soon so it will be ready for us by late December or Early January.  We should be 100% complete and ready for rent by January 15! 


The roof is complete!  We could not be happier.  The two guys that installed it were flown in from Florida to install our roof.   They are the premier clay tile roof installers on St John.  They hung the 6" copper gutters, installed the downspouts and installed this entire clay roof in less than 10 working days!

Wednesday, September 3, 2014

Under Roof!! Doors and windows installed


It's been a month since our last post.  We have had a lot of progress as we received our second container and the trailers with all of our roof material, membrane for the clay tile roof, tongue and groove for the ceilings, windows, exterior and interior doors, along with travertine.


This picture above shows the installation of the tongue & groove ceiling material which is then covered with plywood that is screwed to the rafters.  Once complete a waterproof membrane is applied to insure no damage to the finished ceilings.


As you can seen in the above and below pictures, the tongue and groove has been installed on the lanai and we couldn't be happier.  John is a master of mixing stain, he made a perfect match for the rafters to match the pre-finished tongue and groove ceiling material.


This picture above is a great shot of the covered lanai, stone columns and the location of the built in grill area.


The ceilings have been completed, the above picture is of the great room.


Here Andrew and Sheldon are installing the french door that leads from the gourmet kitchen to the lanai  where the outdoor built in grill is located.


We are completely pleased with the doors and the amount of openings in the great room.  These are ten foot doors with custom transoms above them.  Those have been installed also and the room is full of views from every direction.


The doors we have for the villa were a spectacular find, 8' tall and 3' wide, custom fabricated out of reclaimed barn-wood.  It gives the villa a rustic yet elegant caribbean feel and is like nothing we have ever seen on island.


We started hanging the tongue and groove in the lower bedroom ceilings.  This is an amazing upgrade that makes the rooms feel warm and inviting.


Well the windows are in along with the exterior doors. Plaster should be starting soon.


We have received the 7 pallets of travertine we will be using throughout the villa.  Along with the floor tile, we have custom travertine ledger stone for an accent wall in the 3 master bath suites. 


Hopefully we will have a new post soon, a lot to complete and looking forward to sharing all of our work & progress.


Tuesday, August 5, 2014

Final structural pour went great!!


I wanted to start the blog with a picture of the view, it's just amazing and the constant breezes are such a  welcomed reprieve from our mostly warm and sunny days.  Caribbean Palm Villa survived its first tropical storm, Bertha. This picture was taken from standing up on the roof.  All of our roof framing is 3 x 8 and 3 x 12 pressure treated lumber to resist rot and termites.


This is the view from the street, the pour went very good using the boom pump truck.  The pour consisted of 71.5 yards of concrete.


Another view of the roof framing, this is the ceiling of the large living room.


3 days after the pour we began to strip the forms.  This view is of two kitchen windows to the left and the front door entry between the two pillars which are on top of stone columns.


This a picture of the kitchen, powder bath and laundry room exterior windows.  The wood framing inside the window and door openings need to stay in place for two to three weeks.  As you can see this is a good shot of the rafters which are cast in the concrete wall.


This is always a good picture of the back view of the villa.  The top right corner is where John spent most of his time last week.


This is a view of the scaffolding off the covered veranda which wraps on three sides of the villa.  The wrap around covered veranda offers a lot of shade and retreat from the sun.


This is another view of the covered veranda from the pool deck.  Once all the scaffolding and supports are taken out one will be able to appreciate the architecture. 


The above picture is a closer view of the entry area to the villa.  Over the next couple of weeks we will be final sanding and staining of the beams.  Next will be the cyprus tongue and groove ceiling followed by treated plywood, then covered with a membrane to resist water penetration.  Our clay tile from France is currently in Florida and will be arriving here within the next two weeks.  Please feel free to share your thoughts.

Below are a few pictures of the covered wrap around veranda and the last picture is a shot of the great room, the interior door way which leads to the powder bath, laundry and all three internal bedrooms.


Monday, July 21, 2014

Roof is Framed and Container with windows and travertine is on its way!

Been a very intense 3 weeks since our last post getting ready for the next and final structural concrete pour. Over the past few weeks all of our roof framing materials arrived on site as we planned ahead and ordered the material from Florida long before it was needed on site.  The "curb appeal" is beginning to materialize!


In efforts to keep the job on its lightning pace we have planned ahead, the general contractor should  always be thinking three weeks ahead.  This way you have what you need when you need it as opposed to being "down".  Below is a picture of the 3X8 rafters being set in place in the concrete forms.


Once the rafters are in place and all electric, plumbing, and AC work is complete, the remainder of the forms are set in place and braced.  We will notch the top of each rafter and lay rebar in the notch and then "hook" that piece of the rebar with another piece of rebar to the beam made which is also made out of rebar that will be cast in concrete called a "ring beam".  The picture below is the ring beam which ties all of  the arches of the veranda/lanai to the colums which anchor the roof to the slab below.  Pretty impressive if I must say so myself.


Below is a picture showing our crew hard at work to meet our July 24th 80 +/- yard pour.  If you look closely at the bottom of the columns you get a glimpse of some of the stone work that will accent this  beautiful villa.


 Below is a pretty impressive view from below the villa looking up


Backing up a few steps..... the picture below represents some of the rafters for our roof.  We stand them on edge to allow the wood to dry for a week or two before we plane the boards to "clean" the boards up so they look nice once in place.


This is a picture of the power planer which makes the appearance of the rafters really crisp and clean.  


Overall we are two months ahead of schedule.  Our concrete is looking to be below budget as we thought this project thru thouroughly and budgeted properly.  Our entire project is actually under budget.  We may be the first to ever say that on island!  Our final picture is one of our doors that was loaded in the container that was shipped out of Chicago today. They should be on island over the next couple of weeks and we will be ready to install all of them.  Thursday the 24th is our concrete pour.  We will update the blog most likely friday evening.